

Die Cut Printing Guide
Die-Cut Printing Guide
Whether you're ordering contour-cut signs, stickers, foam boards, acrylic, PVC, coroplast, or other custom-shaped products, properly preparing your artwork and cutline files will help prevent production delays and ensure the best possible cutting results.
Our cutting equipment follows vector cut paths, not the visible edge of your artwork. Please review all requirements below before submitting your files.
What You'll Need
-
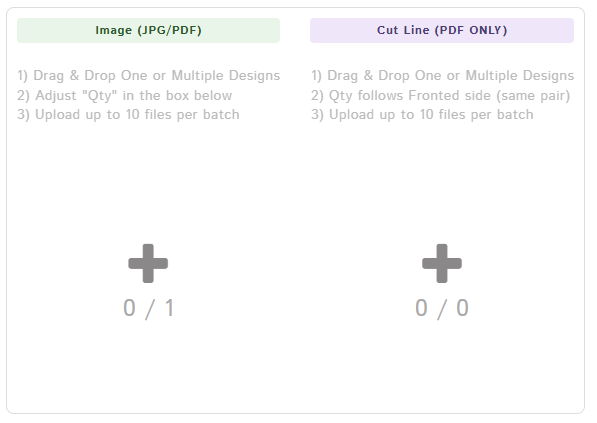
Artwork JPG/PDF containing your printed graphics.
-
Cutline PDF containing only the vector paths used for cutting.
Important: Both files must be the exact same document size, orientation, and position so they align correctly when placed together.
Upload Two Separate Files
File 1: Artwork JPG/PDF
Your artwork file should contain only the graphics that will be printed, including:
- Images
- Graphics
- Text
- Logos
- Backgrounds
Do not include the cutline as part of the printed artwork.
File 2: Cutline PDF
Your cutline file should contain only the vector paths that tell our equipment where the product should be cut.
Do not include:
- Images
- Text
- Logos
- Backgrounds
- Hidden objects
- Clipping masks
- Unnecessary design elements
Cutline Requirements
Your cutline must meet the following requirements:
- Vector paths only
- Closed paths
- Continuous paths
- Single stroke
- No fill
- No duplicate or overlapping paths
- Text converted to outlines when applicable
- Saved as a PDF
The cutting equipment follows the vector path exactly. Raster images such as JPG or PNG files cannot be used as cut paths.
Add Proper Bleed
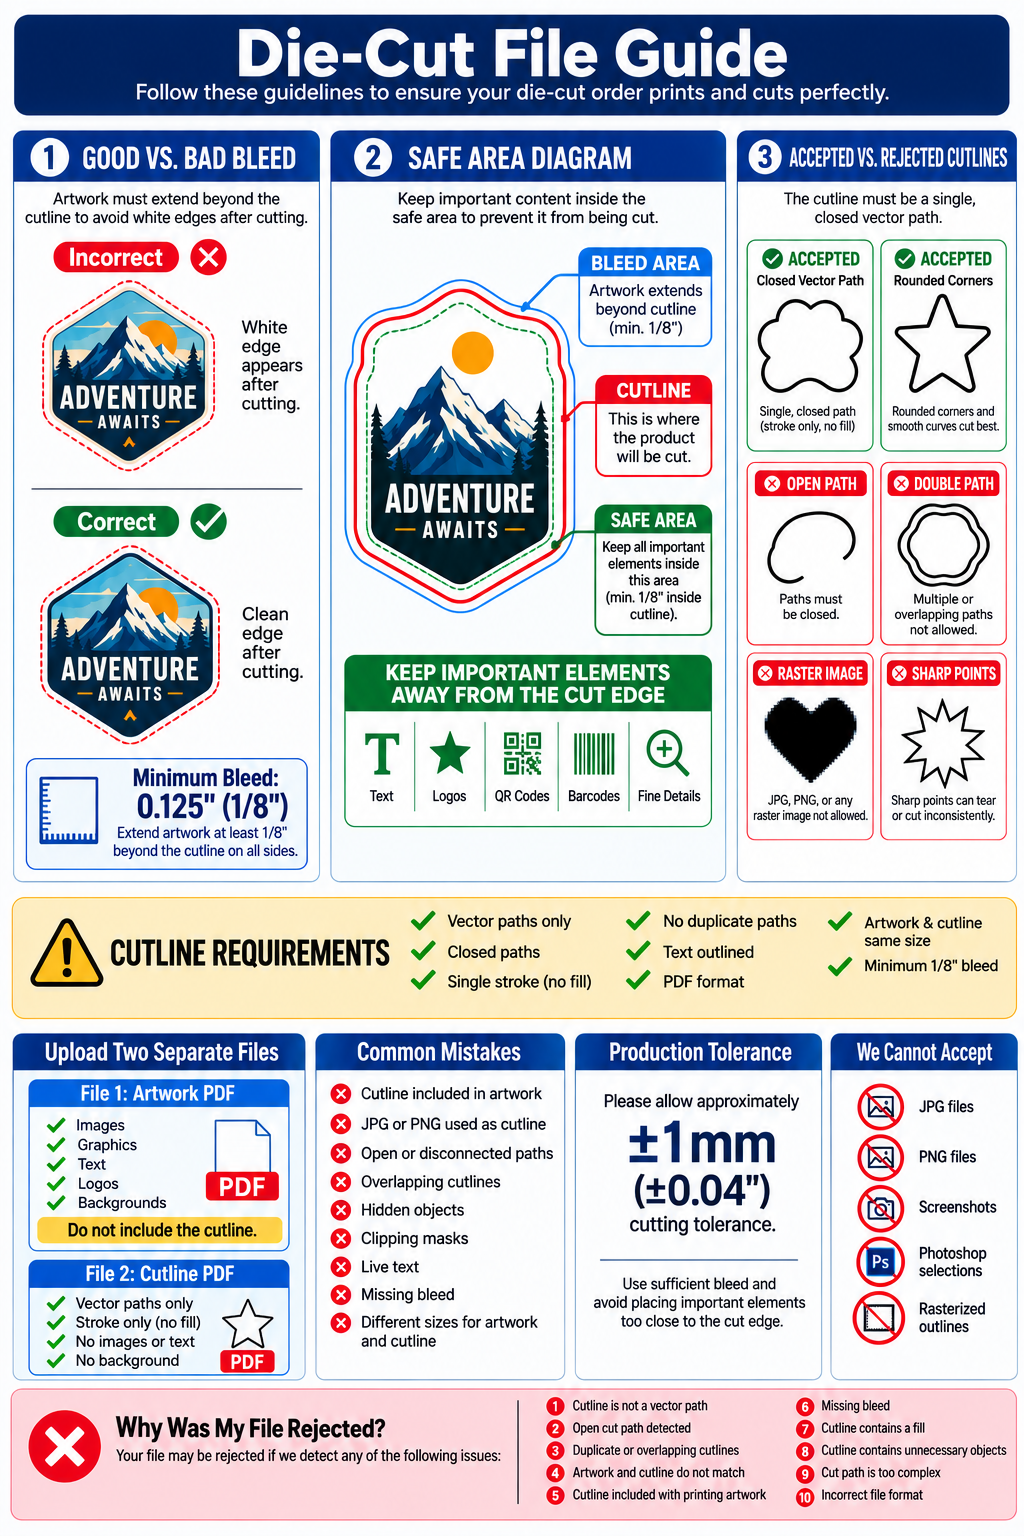
If your design prints all the way to the cut edge, your artwork must extend beyond the cutline.
Minimum Bleed: 0.125" (1/8")
Extend your artwork at least 1/8" beyond the cutline on all sides.
Incorrect: Artwork ends exactly at the cutline.
This may result in unwanted white edges after cutting.
Correct: Artwork extends beyond the cutline.
This allows normal cutting tolerance without exposing an unprinted edge.
Keep Important Content Inside the Safe Area
Important design elements should be kept away from the cut edge.
Recommended Safe Area: 0.125" (1/8") Inside the Cutline
Keep the following important elements inside the safe area:
- Text
- Logos
- QR codes
- Barcodes
- Phone numbers
- Fine details
Keeping important elements away from the cut edge helps prevent them from being trimmed due to normal production tolerances.
Use Smooth Curves and Rounded Corners
Whenever possible, use smooth curves and slightly rounded corners when creating your cutline.
Avoid:
- Extremely sharp points
- Very tight corners
- Extremely narrow sections
- Unnecessary anchor points
Smooth, simplified cut paths generally produce cleaner and more consistent finished products.
Avoid Extremely Small or Complex Cut Details
Very small or complicated cut details may not reproduce accurately and may weaken the finished product.
Avoid:
- Thin spikes
- Tiny internal cutouts
- Very small islands
- Hairline bridges
- Excessive anchor points
- Extremely complicated paths
For the best results, simplify your cutline whenever possible.
Common Die-Cut File Mistakes
- Cutline included as part of the printed artwork
- JPG or PNG used as a cutline
- Open or disconnected vector paths
- Duplicate or overlapping cutlines
- Hidden objects inside the cutline file
- Clipping masks
- Live text used as part of the cut path
- Unexpanded effects or shapes
- Artwork and cutline files created at different sizes
- Incorrect artwork orientation
- Missing bleed
- Important text or logos positioned too close to the cutline
Adobe Illustrator Setup
- Create and finalize your print artwork.
- Create a vector outline showing exactly where you want the product cut.
- Make sure the cutline is a closed vector path.
- Remove the fill from the cutline and use a stroke only.
- Remove duplicate or overlapping paths.
- Save your artwork as one PDF.
- Save your cutline as a separate PDF.
- Confirm that both PDF files have identical document dimensions and orientation.
We Cannot Accept Raster Cutlines
Cutlines must be supplied as vector paths.
The following cannot be used as cutlines:
- JPG files
- PNG files
- Screenshots
- Photos
- Flattened Photoshop selections
- Rasterized outlines
Simply placing a JPG or PNG image inside Illustrator does not convert it into a usable vector cut path.
Production and Cutting Tolerance
Printing and cutting equipment may have a small amount of normal production movement during manufacturing.
Please allow approximately ±1 mm (±0.04") cutting tolerance.
For this reason, we strongly recommend using sufficient bleed and avoiding thin borders or important design elements positioned directly against the cutline.
Why Was My File Rejected?
If your die-cut file is rejected, it means our system detected an issue with the artwork or cutline that may prevent the file from being produced correctly. Please review the common issues below before re-uploading your files.
-
Cutline Is Not a Vector Path
Your cutline must be created as a vector path. JPG, PNG, raster images, screenshots, or flattened artwork cannot be used as a cutline. -
Open Cut Path Detected
All cut paths must be completely closed. Open or disconnected paths cannot be properly processed by our cutting equipment. -
Duplicate or Overlapping Cutlines
Multiple cut paths placed directly on top of each other may cause the machine to cut the same area more than once. Please remove all duplicate or overlapping paths. -
Artwork and Cutline Do Not Match
Your artwork and cutline files must have the same document size, position, and orientation. The cutline must align exactly with the artwork when both files are placed together. -
Cutline Included With Printing Artwork
The cutline should not appear as part of the printed artwork. Please upload the artwork and cutline as separate PDF files. -
Missing Bleed
Your printed artwork should extend at least 0.125" (1/8") beyond the cutline whenever the design prints to the edge. Missing bleed may result in unwanted white edges after cutting. -
Cutline Contains a Fill
The cutline should be created as a stroke only. Remove any fill from the cut path before saving your file. -
Cutline Contains Unnecessary Objects
The cutline file should contain only the vector paths needed for cutting. Please remove images, text, logos, backgrounds, hidden objects, clipping masks, and other unnecessary elements. -
Cut Path Is Too Complex
Extremely detailed paths, very small cutouts, sharp points, excessive anchor points, or narrow areas may not cut properly. Simplify the cut path and use smooth curves whenever possible. -
Incorrect File Format
Please submit print-ready PDF files. JPG or PNG files cannot be submitted as cutline files.
Before Uploading Your Files
Please review the following checklist before submitting your order:
- Artwork saved as PDF
- Cutline saved as a separate PDF
- Artwork and cutline have identical document dimensions
- Artwork and cutline have identical orientation
- Cutline contains vector paths only
- All cut paths are closed
- No duplicate or overlapping cut paths
- Cutline has stroke only and no fill
- Minimum 0.125" (1/8") bleed added when required
- Important content kept at least 0.125" inside the cutline
- No unnecessary objects inside the cutline file
- Cut path has been simplified where possible
Before Re-Uploading a Rejected File
Please correct the issue indicated by the file rejection message and review your artwork carefully before uploading again.
Re-uploading the same file without correcting the detected issue may result in the file being rejected again or revoke permission to place Die-cut/Contour cut products.