
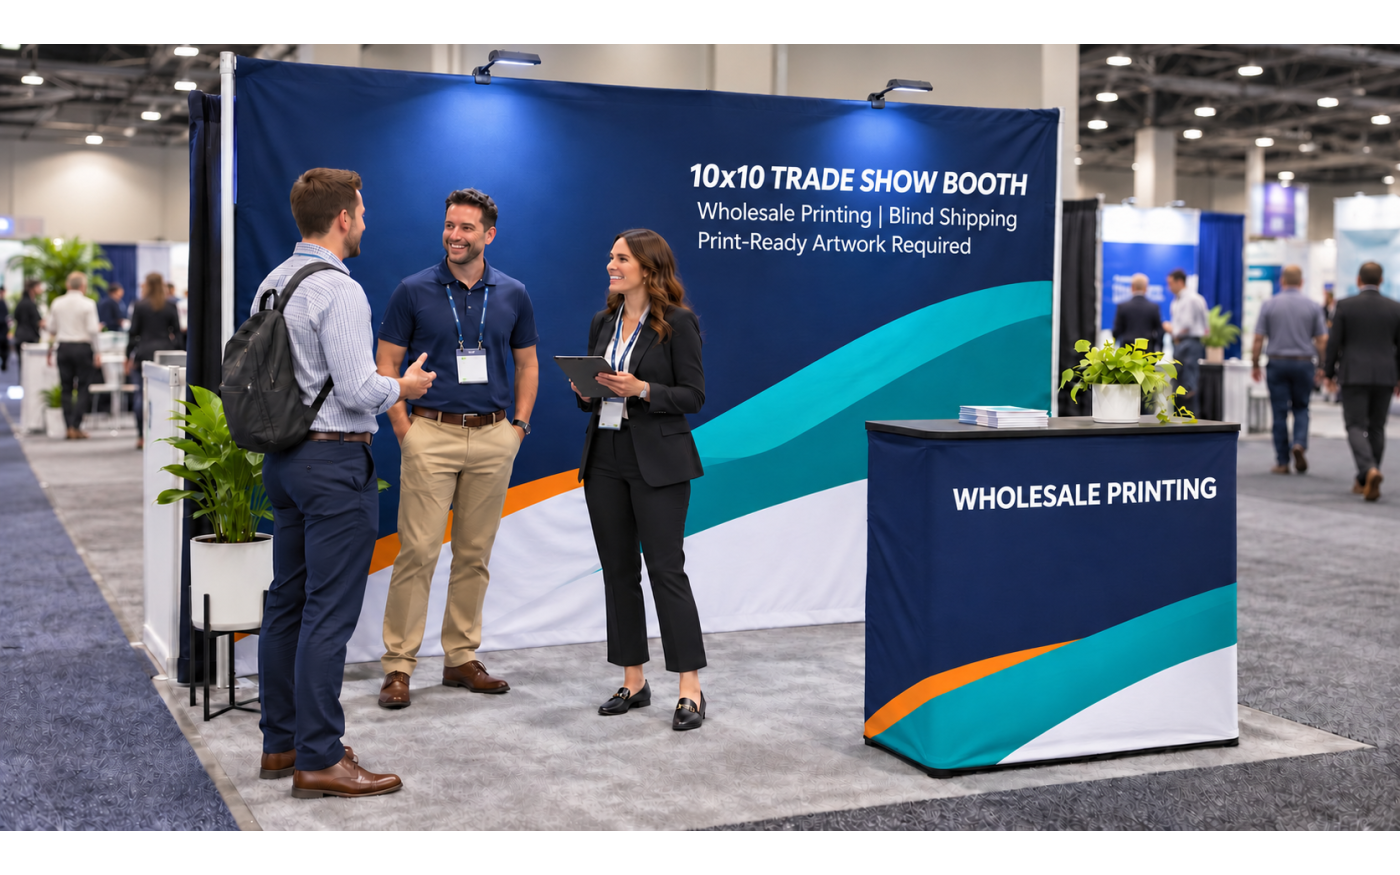
A 10x10 trade show booth can look professional without requiring a large display budget. For many events, one strong backwall, one functional work surface, and an open entrance provide everything a business needs to present its brand and speak with visitors.
The right setup depends on the purpose of the event. A company collecting leads may need a compact counter, while a team demonstrating a product needs more open floor space. Businesses attending several shows should also consider reusable hardware, shipping, storage, and replacement graphics.
A common mistake is trying to fill all 100 square feet. Too many tables, displays, or chairs can make the booth feel crowded and discourage visitors from entering. The goal is not to use every available inch. It is to create a clear message, a practical layout, and enough room for useful conversations.
What Fits in a 10x10 Trade Show Booth
A 10x10 booth provides 100 square feet of floor space. At many U.S. trade shows, it is used as an inline booth with neighboring exhibitors on both sides and one open side facing the aisle. The exact height limits, furnishings, and display rules vary by event.
A typical setup can hold an 8 ft or 10 ft backwall, one compact counter or table, and a small demonstration area. There may also be room for a monitor, literature holder, or narrow banner stand when the layout is planned carefully.
The front of the booth should remain open. A large table placed across the entrance creates a barrier between employees and visitors. Moving the table or counter toward the back or along one side makes it easier for people to enter and start a conversation.
Vertical space is especially valuable in a small booth. The upper area of the backwall should carry the company name and main message because it remains visible when people are standing in front of the display. Supporting information and QR codes can appear lower on the graphic.
Before choosing any products, check what the event already provides. Some shows include a table, chairs, wastebasket, and basic pipe and drape. Others provide only the floor space. The exhibitor manual should confirm what is included and what must be ordered separately.
Budget-Friendly 10x10 Booth Setups
A budget-friendly booth does not need to look temporary or incomplete. The key is choosing a configuration that supports one main business goal instead of spreading the budget across too many display pieces.
A Backwall and Branded Table for Simple Promotions
A printed backwall paired with a branded table is one of the simplest 10x10 configurations. It can work well for networking events, recruitment fairs, local business expos, and other events focused on company introductions and information sharing.
The backwall provides the primary brand message, while the table offers space for brochures, samples, business cards, and lead capture tools. A fitted or stretch table cover can make a standard event table look more consistent with the rest of the display.
Place the table toward the back or along one side instead of directly across the entrance. Employees should stand beside or in front of it when speaking with visitors. This keeps the booth approachable and prevents the table from becoming a barrier.
A Backwall and Counter for Lead Capture
A compact counter is often more practical than a full-size table when the main goal is collecting leads or holding short sales conversations. It occupies less floor space and allows employees to speak with visitors at a natural standing height.
The counter can hold a tablet, badge scanner, sign-up form, or a small amount of literature. A model with internal storage may also provide space for spare materials, packaging, and employee belongings.
Place the counter near one side of the booth and leave the center open. The backwall can present the main message, while the counter graphic reinforces the company logo or call to action.
A Backwall and Demo Area for Product Presentations
Companies demonstrating software, equipment, or physical products need more than a place to display brochures. A backwall and open demonstration area can support presentations without adding unnecessary furniture.
Place the demonstration point slightly inside the booth rather than directly on the aisle. This gives interested visitors a reason to enter and helps prevent demonstrations from blocking passing traffic.
For a digital presentation, a monitor can be mounted on compatible hardware or placed on a narrow stand. Physical products can be displayed on a compact pedestal, shelf, or counter. Keep the demonstration focused on one main product or problem. Trying to present an entire product range in a small booth usually creates clutter.
Confirm power, internet access, cable routing, and monitor weight before ordering the display hardware. These requirements can affect both the setup and the total event cost.
A Modular Booth Kit for Repeat Events
Companies that attend several events each year may gain better long-term value from a modular booth kit. The hardware can be reused, while new graphics can be produced when branding, products, or campaigns change.
Trade buyers can compare wholesale 10x10 trade show booth kits when they need a coordinated display system designed for a standard 10x10 space. Before choosing a configuration, check the included components, graphic areas, packed dimensions, and setup requirements.
A coordinated kit can make purchasing more efficient. Instead of selecting a backwall, counter, lighting, and accessories from unrelated systems, buyers can compare configurations with components intended to work together.
Check exactly what the selected kit includes. Product images may show counters, lights, shelves, monitors, or flooring that are optional or sold separately. Buyers should also confirm whether replacement graphics can be ordered and whether the hardware can support future event requirements.
The lowest initial price is not always the lowest long-term cost. A reusable system that packs efficiently and can be assembled by the event team may cost less over several shows than repeatedly purchasing temporary displays.
How to Make a Small Booth Look Professional
A professional 10x10 booth needs a clear visual hierarchy. Visitors walking through a busy exhibit hall should be able to identify the company and its main offer within a few seconds.
Use one short headline on the backwall. Long service lists and detailed product descriptions are difficult to read from the aisle. The company name, one clear benefit, and a strong visual usually work better than several competing messages.
Keep the artwork consistent across the backwall, counter, table cover, and supporting displays. Repeated colors, type styles, and graphic elements help separate pieces look like one coordinated booth.
Important text should remain visible when employees and visitors are standing in the space. Place the main message toward the upper part of the backwall. Avoid putting small text, contact details, or QR codes near folds, seams, frame edges, or areas likely to be blocked.
Lighting can also improve a simple setup. Spotlights can make the backwall easier to see, while a backlit graphic can create a stronger focal point. However, lighting may require electrical service from the venue, so the visual benefit should be considered alongside the additional cost.
Storage should be planned before the event. Shipping boxes, coats, bags, and extra literature can quickly make a small booth look disorganized. A counter with storage or a properly covered table can keep these items out of sight.
Most importantly, leave room for conversations. Display hardware should support visitor engagement rather than occupy all the available space.
What to Check Before Ordering
Choosing a layout is only part of the purchasing process. The booth must also fit the event rules, artwork requirements, installation plan, shipping method, and total budget.
Show Rules and Available Space
Review the exhibitor manual before ordering. Confirm the booth type, usable width, maximum display height, sidewall restrictions, flooring requirements, and rules for lighting or electrical equipment.
Do not assume that every 10x10 space provides exactly 10 feet of usable backwall width. Pipe-and-drape bases, neighboring displays, columns, and venue equipment may reduce the available space.
Corner booths may offer two open sides, while standard inline booths usually have only one. The selected layout should match the actual booth position shown on the event floor plan.
Included Components and Print Files
Check the product description carefully to see which frames, graphics, lights, counters, cases, shelves, and accessories are included. Items shown in a product image may not always be part of the selected package.
Customers must provide professional, print-ready artwork based on the correct product template. The customer, print reseller, agency, or their designer is responsible for creating and checking the final design file.
Before submitting artwork, confirm the graphic dimensions, bleed, safe areas, color settings, and image resolution. Names, logos, contact details, QR codes, and other content should also be checked carefully before the order enters production.
A production proof can help confirm file placement and job details, but it does not replace professional graphic design, copy review, or brand approval. Any necessary artwork corrections should be completed by the customer or their designer.
If the hardware will be used for several campaigns, check whether replacement graphics can be ordered separately. New print-ready files will be required whenever the artwork changes.
Setup, Shipping, and Storage
A booth that is affordable to purchase may still be expensive or difficult to transport. Check the number of packages, packed dimensions, total weight, and whether the order ships by parcel service or freight.
The installation process also matters. Confirm how many people are needed, whether tools are required, and how long assembly may take. A system that employees can assemble may reduce outside installation costs, although all venue labor rules must still be followed.
Storage should be considered before the first order. Frames, counters, cases, and graphics need a dry and protected location between events. Printed fabric should be cleaned, packed, and stored correctly to reduce the risk of stains, wrinkles, or damage.
Total Project Cost
The booth kit is only one part of the event budget. Other expenses may include booth-space rental, shipping, material handling, installation labor, electrical service, internet, flooring, furniture, travel, and storage.
Rush production and expedited delivery can also increase the final cost. Plan backward from the event date and allow time for professional artwork preparation, internal approval, file review, proof approval, production, shipping, and a test setup.
For repeat events, compare the cost per use instead of focusing only on the first order. Durable hardware and replaceable graphics may provide better value when the same system is used throughout the year.
Wholesale Trade Show Booth Kits From 777Sign
777Sign manufactures 10x10 and 10x20 trade show booth kits for registered trade customers. The available configurations support print resellers, advertising companies, event suppliers, and other businesses purchasing displays for upcoming projects.
Explore wholesale trade show booth kits to compare the available booth sizes, layouts, graphic areas, hardware, and product options. Select a kit based on the reserved space, required components, transportation plan, and expected number of uses.
777Sign focuses on printing and production rather than creative design. Customers must supply professional, print-ready artwork using the correct product template. All text, logos, colors, images, bleed, and graphic dimensions should be reviewed before the files are submitted.
Allow enough time for file review, proof approval, production, and delivery. Any design changes or artwork corrections must be completed by the customer or their designer before the order moves into production.
Ready to place an order? Register for a 777Sign trade account to view trade pricing and available product options.
Final Thoughts
An effective 10x10 booth does not need many display products. One clear backwall, one functional table or counter, and enough open space for conversations can create a professional setup on a controlled budget.
Choose the configuration based on what the booth needs to accomplish. A simple table setup may be enough for networking and information sharing. A counter works well for lead capture, while an open demo area supports product presentations. Companies attending multiple events may gain more value from a reusable modular kit.
Before ordering, confirm the show rules, included components, shipping requirements, installation process, artwork specifications, and total project cost. Download the correct product template and have a professional designer prepare the print-ready files.
The best budget option is not always the one with the lowest purchase price. It is the setup that performs reliably, travels efficiently, and can be reused across the planned event schedule.
Frequently Asked Questions
How Many People Should Staff a 10x10 Booth?
Two employees are usually enough. One person can speak with visitors while the other handles demonstrations or lead capture. Too many employees can make the space feel crowded.
Is It Cheaper to Rent or Buy a 10x10 Booth?
Renting may make sense for a one-time event or frequently changing booth sizes. Buying can provide better long-term value when the same display is used at several events and the company can manage transportation and storage.
Does a Trade Show Booth Kit Include the Floor Space?
No. A booth kit normally refers to the physical display hardware and printed graphics. The 10x10 floor space is reserved and paid for separately through the trade show organizer.
Does 777Sign Design Trade Show Booth Graphics?
No. Customers must provide professional, print-ready artwork based on the correct product template. The file should be checked for size, bleed, resolution, colors, text, and image placement before submission.