
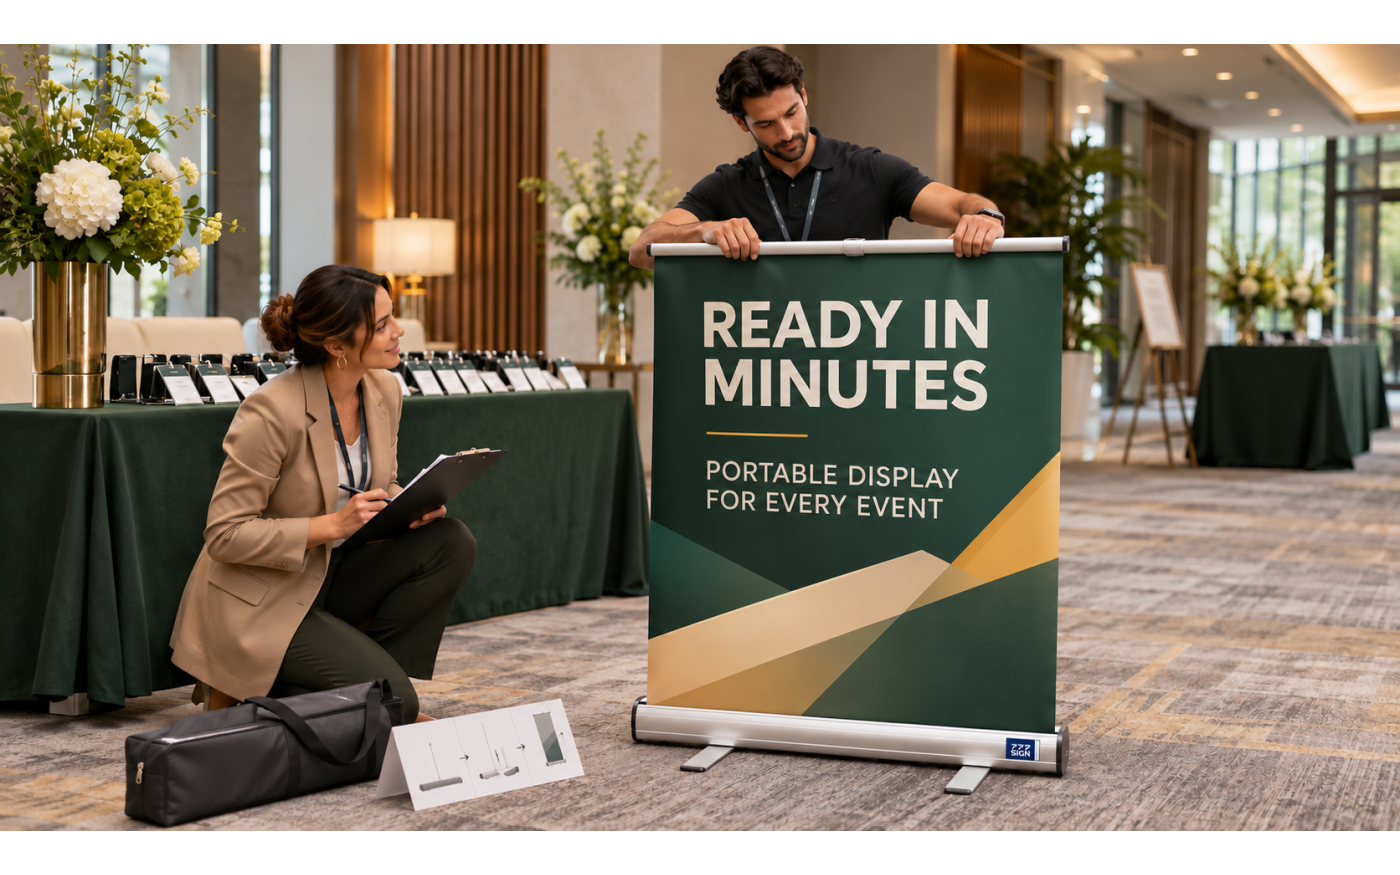
Most retractable banner stands can be set up by one person in a few minutes. Place the base on a level surface, assemble the support pole, pull the graphic straight up, and connect the top rail to the pole.
Taking the stand down requires more care. Keep control of the top rail and guide the graphic slowly into the base. Letting it snap back can cause wrinkles, damaged edges, or an uneven roll.
The exact hardware varies by model. A single-sided stand, double-sided stand, adjustable stand, and interchangeable graphic system may use different poles and connectors. Follow the instructions for the specific product when they differ from the general steps below.
How to Set Up a Retractable Banner Stand
Choose a clean indoor area with enough ceiling height and floor space. Do not force any part that does not connect easily. A missing pole section or incorrectly positioned foot can make the completed stand unstable.
Check the Parts and Floor Surface
Open the carrying bag and confirm that you have the retractable base, support pole, printed graphic, top rail, and any model-specific hardware.
The graphic will normally arrive installed inside the base when a complete printed display is ordered. Do not open the base or pull on exposed material unless the product instructions require it.
Inspect the base for shipping damage. Check that the top rail is attached, the pole sections connect correctly, and the stabilizing feet rotate freely.
Place the base on a flat, dry surface. Remove cables, bags, boxes, and other objects that could create a trip hazard. Make sure there is enough room above the stand for the graphic to reach its full height.
If you are still deciding which model or size fits a project, review this retractable banner guide before preparing the artwork or ordering hardware.
Rotate the Stabilizing Feet
Many standard retractable banner stands have one or two feet that rotate out from the base. Turn each foot until it sits perpendicular to the base.
The feet should rest completely on the floor. Do not pull up the graphic while they remain folded against the unit.
Some deluxe stands use a wider base without rotating feet. Double-sided and heavy-duty models may also use different support designs. If the stand has no visible feet, do not try to force the base apart.
Position the front of the base toward the viewing area. The support pole normally installs behind the graphic.
Assemble and Insert the Support Pole
Remove the pole sections from the bag or storage area in the base. Connect all sections firmly.
Some poles use an internal elastic cord that guides the sections together. Others telescope and lock at the required height. Confirm that every joint is fully seated before inserting the pole into the base.
Place the bottom of the assembled pole into the socket at the back of the base. Push it down until it feels secure. A pole that is not fully inserted can cause the graphic to lean forward.
For an adjustable pole, do not extend it beyond the recommended height. Lock each clamp before raising the graphic.
Raise the Graphic Slowly
Stand behind the base and hold the center of the top rail with both hands when possible. Pull the graphic upward in a straight, controlled motion.
Do not pull from only one corner. Uneven force can make the graphic track toward one side of the opening and rub against the base.
Keep the top rail level as the graphic rises. Stop if the material catches, twists, or makes an unusual sound. Lower it slightly, recenter the rail, and try again without forcing it.
Avoid touching the printed surface more than necessary. Clean hands can help prevent fingerprints, dirt, and oils from transferring to the graphic.
Secure the Top Rail
Raise the graphic until the top rail reaches the support pole. Attach the rail to the hook, slot, or connector at the top of the pole.
Check that the connection is centered and fully engaged before releasing the rail. The pole should support the graphic without bending or leaning.
Step back and inspect the display. The graphic should appear straight, the base should sit flat, and the printed surface should not rub against either side of the opening.
Do not move the stand across the room while the graphic is extended. Take it down first, move the base, and set it up again in the new position.
How to Take Down and Pack the Stand
A retractable stand can be damaged quickly if the top rail is released and allowed to snap into the base. The person taking it down should control the graphic until it is fully retracted.
Hold and Release the Top Rail
Stand behind the display and hold the center of the top rail. Keep one hand on the rail while releasing it from the top of the support pole.
If the connector feels tight, reduce the tension by lifting the rail slightly before detaching it. Do not twist the pole or pull sharply on one side.
Once released, keep the top rail level. The internal spring will begin pulling the graphic toward the base.
Guide the Graphic Into the Base
Use both hands to lower the top rail slowly. Keep the graphic centered over the opening.
Watch the edges as the material enters the base. If one side begins retracting faster, stop and raise the graphic slightly. Recenter the rail before continuing.
Never let go of the top rail. A fast retraction can crease the graphic, damage the top rail, or cause the material to roll unevenly inside the cassette.
Continue guiding the graphic until the rail rests securely against the base.
Disassemble and Pack the Hardware
Remove the support pole only after the graphic is fully retracted. Fold or collapse the pole according to its design.
Return the pole to its storage compartment or carrying bag. Rotate any stabilizing feet back against the base and check that no loose parts remain on the floor.
Place the base into the bag without forcing it. Keep sharp accessories, tools, and heavy objects away from the graphic opening.
For frequent shipping, consider using an outer carton or hard-sided shipping case. A soft carrying bag protects against dust and light handling but may not protect the base from heavy freight stacked on top.
Common Setup Problems and Safe Fixes
Begin with external checks that do not require opening the base. If the hardware is bent, the internal spring has failed, or the graphic remains stuck, stop using the stand and confirm the model before attempting further repair.
The Stand Is Leaning
First check the floor. Move the display to a flat surface and remove any object under the base or feet.
Make sure all stabilizing feet are fully rotated and resting evenly. Check that the support pole is straight, fully assembled, and seated completely in the base.
If the stand still leans, inspect the pole, socket, and base for visible damage. Do not use temporary tape or unsupported objects to hold an unstable display upright in a customer area.
The Graphic Retracts Unevenly
Uneven retraction often occurs when the top rail is lowered at an angle.
Hold the rail level, pull the graphic up a short distance, and guide it down again from the center. Do not push one edge into the opening.
Check for folded or damaged edges. If the same side continues catching, stop before the graphic develops a permanent crease.
The Graphic Will Not Retract
Confirm that the top rail is centered and the graphic is not twisted. Some interchangeable stands also have a locking or tension pin that must be removed during normal use.
Do not pull harder when the graphic is stuck. Do not open the cassette or insert tools into the roller mechanism without instructions for that exact model.
A failed spring, damaged leader, or bent base may require professional service or replacement hardware.
The Top Rail Comes Loose
Lower the graphic while keeping control of it. Inspect the rail and connector before setting up the stand again.
Some rails use a clamp, adhesive strip, hook, or internal rod. A repair method suitable for one system may not work with another.
If the graphic has pulled out of the rail, confirm the attachment method and finished dimensions before reinstalling it. An unsecured top edge can release suddenly and allow the graphic to retract into the base.
Preparing Banner Stands for Client Delivery
Printing shops, signage companies, and display providers should test each completed stand before shipping it to a client.
Fully set up the unit once and check the graphic orientation, pole connection, top rail, alignment, and base stability. Then guide the graphic back into the cassette to confirm that it retracts evenly.
For multi-version orders, match every stand with the correct graphic before packing. Add the client name, location, event, or Job ID to the outer carton and carrying case. Do not rely on the visible graphic after it has been retracted.
Confirm that every package includes the correct pole, carrying bag, and model-specific accessories. A short printed setup card can reduce support calls when the order ships directly to an end customer.
Photograph the completed display and packed contents before closing the carton. Keep the product model, graphic size, artwork version, and delivery details in the job record. This information will also help with repeat orders and replacement hardware.
Many post-purchase problems begin with selecting the wrong hardware for the intended use. This guide to common reasons businesses regret buying a retractable banner stand can help trade buyers review stability, size, replacement options, and expected usage before ordering.
Wholesale Retractable Banner Stands From 777Sign
777Sign offers wholesale retractable banner stands for registered printing shops, signage companies, agencies, and display providers.
Available options include double-foot, adjustable, deluxe, HD, double-sided, and table-top models in several sizes. Trade buyers can order complete printed displays, selected insert-only options, or compatible banner stand hardware, depending on the product.
The 33" × 81" Deluxe Retractable Stand provides a wider base and carrying bag for indoor events, trade shows, retail promotions, and business displays.
Customers must provide professional, print-ready artwork based on the template for the selected product. Before submitting a multi-version order, confirm the size, orientation, quantity, Job ID, turnaround option, and shipping destination for every design.
If the display will be shipped directly to a client, test the artwork and hardware specifications before production. Register for a 777Sign trade account to review product options and available account pricing.
Final Thoughts
A retractable banner stand is simple to use when the correct sequence is followed. Start on a level surface, secure the feet and pole, raise the graphic from the center, and connect the top rail.
Taking the stand down requires the same level of care. Hold the rail, keep it level, and guide the graphic into the base slowly. Never let the spring pull the graphic back without control.
For resellers and display providers, a short pre-shipment test can prevent many customer complaints. Confirm the artwork version, inspect the completed unit, check every accessory, and label the package clearly.
If a stand is leaning, jammed, or damaged, begin with safe external checks. Do not open the spring mechanism without model-specific instructions.
Frequently Asked Questions
Are Roll-Up and Retractable Banner Stands the Same?
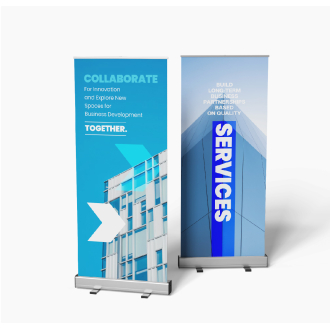
Yes. “Roll-up,” “pull-up,” and “retractable” commonly describe banner graphics that extend from and retract into a base cassette.
Do Double-Sided Retractable Stands Set Up Differently?
They may use two graphics, additional poles, or different top connectors. Follow the instructions for the specific double-sided model. Learn more about wholesale double-sided banner stands.
Can the Graphic Be Replaced Without Buying a New Stand?
Some models accept replacement graphics, but the new insert must match the base, top rail, dimensions, and attachment method. Confirm compatibility before printing.
Can Retractable Banner Stands Be Used Outdoors?
Only use a stand outdoors when the specific model is designed for it. Standard indoor retractable stands may tip over or suffer damage in wind.